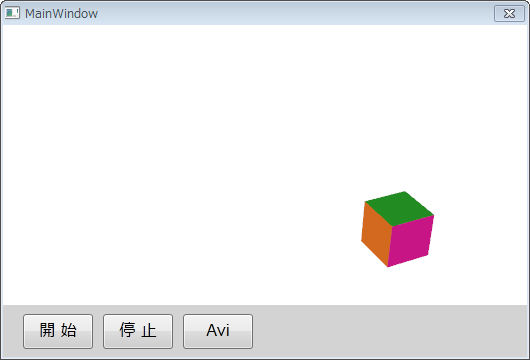
Viewport3D 内に配置した立方体を自公転させるアニメーションです。
自転のアニメーションは、通常の RotateTransform3D を使った DoubleAnimation で作成します。
公転のアニメーションでは、公転の軌道円を EllipseGeometry で記述し、これをもとにした DoubleAnimationUsingPath を使用します。
AnimationClock は、自転用に1個、公転用に2個作成して、アニメーションを行います。
アニメーション作成の画面は以下のようになります。
2.使用した開発環境
第1例 と同じく、以下の開発環境を使用しました。
開発環境:Visual Studio 2010 Professional Edition
.NET Framework:.NET Framework 4 Client Profile
古いバージョンを使いましたが、最新の開発環境でも問題なく使用できると思います。
3.XAML コード
XAML コードでは、Canvas と ボタン類を配置します。
Canvas 内には、3Dオブジェクトを配置するための Viewport3D を設け、Viewport3D 内には、Camera と Light を設けます。
アニメーション対象の立方体も Viewport3D 内に配置しますが、本例では、XAML コードではなく、C#コードで設定します。
なお、ボタンのサイズ、位置、フォントなどを設定する記述は省略しています。
<Window x:Class="Example05_3DAnimation01.MainWindow"
xmlns="http://schemas.microsoft.com/winfx/2006/xaml/presentation"
xmlns:x="http://schemas.microsoft.com/winfx/2006/xaml"
Title="MainWindow" Width="530" Height="360"
WindowStartupLocation="CenterScreen" ResizeMode="NoResize">
<Grid>
<Grid.RowDefinitions>
<RowDefinition Height="280"/>
<RowDefinition Height="*"/>
</Grid.RowDefinitions>
<Canvas Name="cvs1" Grid.Row="0" Background="White" >
<Viewport3D x:Name="myViewport" Width="524" Height="280">
<!-- Camera -->
<Viewport3D.Camera>
<PerspectiveCamera x:Name="myCamera" Position="0,15,30" LookDirection="0,-15,-27" />
</Viewport3D.Camera>
<!-- Light -->
<ModelVisual3D>
<ModelVisual3D.Content>
<AmbientLight Color="White" />
</ModelVisual3D.Content>
</ModelVisual3D>
</Viewport3D>
</Canvas>
<StackPanel Grid.Row="1" Orientation="Horizontal" Background="LightGray">
<Button Name="btnStart" Content="開 始" Click="btnStart_Click" />
<Button Name="btnStop" Content="停 止" Click="btnStop_Click" />
<Button Name="btnAvi" Content="Avi" Click="btnAvi_Click" />
</StackPanel>
</Grid>
</Window>
4.C#コード
C#コードで、立方体を Viewport3D内に配置して、自転公転させるアニメーションを記述します。
// usingによって名前空間を参照するコードの部分は省略
public partial class MainWindow : Window
{
// コンストラクター
public MainWindow()
{
InitializeComponent();
InitializeWindow();
}
private const double RADIUS = 10; // Cubeの公転半径
private const double TIME1 = 4; // Cubeの自転周期
private const double TIME2 = 8; // Cubeの公転周期
private AnimationClock _clockSR, _clockTrX, _clockTrZ;
// [Avi]ボタンクリックイベント
private void btnAvi_Click(object sender, RoutedEventArgs e)
{
var filepath = GetAviFilePath();
if (0 < filepath.Length)
{
SaveAsAvi(filepath);
MessageBox.Show("OK");
}
}
// [開始]ボタンクリックイベント
private void btnStart_Click(object sender, RoutedEventArgs e)
{
_clockSR.Controller.Begin();
_clockTrX.Controller.Begin();
_clockTrZ.Controller.Begin();
}
// [停止]ボタンクリックイベント
private void btnStop_Click(object sender, RoutedEventArgs e)
{
_clockSR.Controller.Stop();
_clockTrX.Controller.Stop();
_clockTrZ.Controller.Stop();
}
// Cube各面のGeometryModel3Dを返すメソッド
private GeometryModel3D GModel3D(Brush brush, Point3DCollection vp3col)
{
var meshgm3d = new MeshGeometry3D();
meshgm3d.Positions = vp3col;
meshgm3d.TriangleIndices = new Int32Collection(new int[] { 0, 1, 2, 0, 2, 3 });
meshgm3d.TextureCoordinates = new PointCollection(new Point[] {
new Point(0, 0), new Point(0, 1), new Point(1, 1), new Point(1, 0) });
var geometry = new GeometryModel3D();
geometry.Geometry = meshgm3d;
geometry.Material = new DiffuseMaterial(brush);
return geometry;
}
// Aviファイル保存パス取得
private string GetAviFilePath()
{
// 省略
}
// Cubeを生成するメソッド
private void CreateCube()
{
// Cube六面の形状指定
Point3DCollection[] p3col = new Point3DCollection[6];
p3col[0] = ((Point3DCollection)(new Point3DCollectionConverter().ConvertFromString(
"1,-1,-1 1,-1,1 -1,-1,1 -1,-1,-1"))); // 底面
p3col[1] = ((Point3DCollection)(new Point3DCollectionConverter().ConvertFromString(
"-1,1,-1 -1,1,1 1,1,1 1,1,-1"))); // 上面
p3col[2] = ((Point3DCollection)(new Point3DCollectionConverter().ConvertFromString(
"-1,1,-1 -1,-1,-1 -1,-1,1 -1,1,1"))); // 左横面
p3col[3] = ((Point3DCollection)(new Point3DCollectionConverter().ConvertFromString(
"1,1,1 1,-1,1 1,-1,-1 1,1,-1"))); // 右横面
p3col[4] = ((Point3DCollection)(new Point3DCollectionConverter().ConvertFromString(
"1,1,-1 1,-1,-1 -1,-1,-1 -1,1,-1"))); // 奥
p3col[5] = ((Point3DCollection)(new Point3DCollectionConverter().ConvertFromString(
"-1,1,1 -1,-1,1 1,-1,1 1,1,1"))); // 手前
// Cube六面の色指定
Color[] color = { Colors.Yellow, Colors.ForestGreen, Colors.MediumVioletRed,
Colors.DodgerBlue, Colors.Chocolate, Colors.Red};
var groupM = new Model3DGroup();
for (int i = 0; i < 6; i++)
{
var gmodel = GModel3D(new SolidColorBrush(color[i]), p3col[i]);
groupM.Children.Add(gmodel);
}
// Cubeの生成
var cube = new ModelUIElement3D();
cube.Model = groupM;
// CubeのTransform設定
var groupT = new Transform3DGroup();
cube.Transform = groupT;
// Cube自転のTransformとAnimation
var axis3d = new AxisAngleRotation3D(new Vector3D(0, 1, 0), 0);
groupT.Children.Add(new RotateTransform3D(axis3d));
var da1 = new DoubleAnimation(0, 360, new Duration(TimeSpan.FromSeconds(TIME1)));
da1.RepeatBehavior = RepeatBehavior.Forever;
_clockSR = da1.CreateClock();
axis3d.ApplyAnimationClock(AxisAngleRotation3D.AngleProperty, _clockSR);
_clockSR.Controller.Stop();
// Cube公転のTransformとAnimation(X方向)
var eg = new EllipseGeometry(new Point(0, 0), RADIUS , RADIUS); // 公転軌道
var tr3dX = new TranslateTransform3D();
groupT.Children.Add(tr3dX);
var da2 = new DoubleAnimationUsingPath();
da2.Duration = new Duration(TimeSpan.FromSeconds(TIME2));
da2.PathGeometry = PathGeometry.CreateFromGeometry(eg);
da2.Source = PathAnimationSource.X;
da2.RepeatBehavior = RepeatBehavior.Forever;
_clockTrX = da2.CreateClock();
tr3dX.ApplyAnimationClock(TranslateTransform3D.OffsetXProperty, _clockTrX);
_clockTrX.Controller.Stop();
// Cube公転のTransformとAnimation(Z方向)
var tr3dZ = new TranslateTransform3D();
groupT.Children.Add(tr3dZ);
var da3 = new DoubleAnimationUsingPath();
da3.Duration = new Duration(TimeSpan.FromSeconds(TIME2));
da3.PathGeometry = PathGeometry.CreateFromGeometry(eg);
da3.Source = PathAnimationSource.Y;
da3.RepeatBehavior = RepeatBehavior.Forever;
_clockTrZ = da3.CreateClock();
tr3dZ.ApplyAnimationClock(TranslateTransform3D.OffsetZProperty, _clockTrZ);
_clockTrZ.Controller.Stop();
// Viewport3DへのCube配置
myViewport.Children.Add(cube);
}
private void InitializeWindow()
{
CreateCube()
}
// Aviファイル作成
private void SaveAsAvi(string filepath)
{
var fps = 48; // フレームレート
var totalFrames = (int)(fps * TIME2); // 全フレーム数
var secs = Enumerable.Range(0, totalFrames).Select(t => (((double)t) / fps));
var aviManager = new AviFile.AviManager(filepath, false);
AviFile.VideoStream aviStream = null;
var tempFile = "frame.png";
foreach (var sec in secs)
{
_clockSR.Controller.SeekAlignedToLastTick(TimeSpan.FromSeconds(sec),
TimeSeekOrigin.BeginTime);
_clockTrX.Controller.SeekAlignedToLastTick(TimeSpan.FromSeconds(sec),
TimeSeekOrigin.BeginTime);
_clockTrZ.Controller.SeekAlignedToLastTick(TimeSpan.FromSeconds(sec),
TimeSeekOrigin.BeginTime);
cvs1.UpdateLayout();
cvs1.SaveImage(tempFile); // cvs1の画像をファイルに保存する
var bmp = new System.Drawing.Bitmap(tempFile);
if (aviStream == null)
aviStream = aviManager.AddVideoStream(true, fps, bmp);
else
aviStream.AddFrame(bmp);
bmp.Dispose();
}
aviManager.Close();
_clockSR.Controller.Stop();
_clockTrX.Controller.Stop();
_clockTrZ.Controller.Stop();
System.IO.File.Delete(tempFile);
}
}
立方体とそのアニメーションの生成は[CreateCube]メソッドで行います。
アニメーションの開始は、[開始]ボタンクリックイベント内の、各 AnimationClock の Begin メソッドで行います。
アニメーションの停止は、[停止]ボタンクリックイベント内の、各 AnimationClock の Stop メソッドで行います。。
Aviファイル作成のためにフレーム画像を取り出す操作は、[SaveAsAvi]メソッド内の、各 AnimationClock の SeekAlignedToLastTick メソッドで行います。
[SaveAsAvi]メソッドの中間付近にある cvs1 の SaveImage 拡張メソッドについては、第1例 の記載を参照してください。